How to use a Dry Herb Vaporizer - Tutorial & Guidance
Read this post to fully understand the basics of vaporizing dry herbs. We explain everything in an organized way so you can understand everything from combustion and convection to choosing the right temperature and packing the vape properly.
Dry Herb Vaporizer Basics
Since dry herb vaporizers are still relatively new to the market, many smokers don’t know how to use them or that they even exist. There are so many dry herb vaporizer options available, and you can put them into two main categories: desktop vaporizers and portable vaporizers. There is also the difference between combustion and convection vapes. The portable vaporizers are easily the most popular, and while there are many differences between each type, all options use electronics to heat dry herbs, releasing aromas and flavors without burning the material. This vapor is free of dangerous byproducts of combustion. There are pros and cons for each type so hopefully after reading this, you’ll find the perfect dry herb vaporizer for your needs and know how to use it properly.
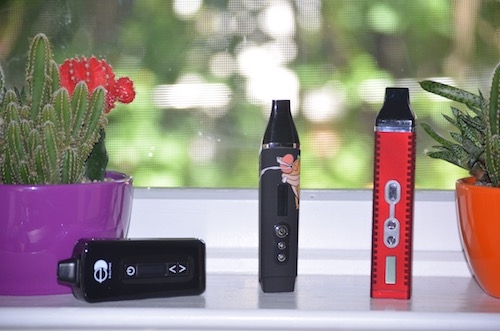
Desktop Vaporizers are great to have at home for the dry herb aficionado. They aren’t super portable but are extremely reliable and provide even, precise heat. They always vaporize your dry herb to perfection for maximum effect and unparalleled flavor. And the best part about desktop vapes; they plug in so you never need to charge them. The best desktop dry herb vaporizer on the market is the Volcano Classic, but it will set you back a pretty penny. There are many more desktop vapes available but nothing quite stacks up.
However, due to desktop vapes lack of portability, plus advances in technology and the booming interest in vape pens, portable vaporizer options are ideal for most users. Although the average portable herb vape is the healthier, convection style, the biggest difference can be the heating method: combustion or convection. So without further ado, let’s get into the science behind these two methods of consuming your favorite herbs.
Combustion vs Convection
While the healthier convection vaporizers use convection (just like your oven) to bake the herbs, releasing their sweet aromas and flavors, some vaporizers use a hot coil to burn your herbs (combustion). Many users switch to vaping because it’s a ‘healthier’ alternative to smoking. This is because many vaporizers use convection to heat herbs to a much lower temperature than is needed to burn them. Baking at a lower temperature is much more ideal for releasing trichomes, the microscopic hairs present on many herbs containing the most important elements for flavor, aroma and health benefits. Hands down a top option for a portable convection vape is the E-CLIPSE. And if you want a great value at under $50, we recommend the Titan 2 vaporizer.
However, if you buy a combustion vaporizer for dry herbs, the process burns he herb, releasing the aromas as well as other carcinogens found in smoke. While not as healthy, combustion vapes provide a more traditional smoking experience. They are certainly more efficient in cold, wet and windy conditions, making combustion vapes ideal when you’re out boarding in nasty weather or just want that real smoking experience with the convenience of a vape. The AGO is a popular combustion vape option. It’s affordable, small, reliable and one of the most convenient and easy to use vape pens on the market. If you want that a combustion vape that really hits hard, you might be into a box mod with an herb attachment like the SteamCloud.
Grinding the various Dry Herbs
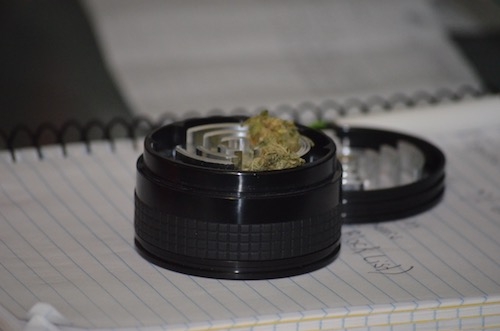
When using a dry herb vaporizer, it is essential that you grind your buds. A quality, sharp herb grinder will ensure an even grind, breaking the buds into much smaller particles. You don’t want it quite as fine as a powder but you also don’t want any big chunks of dense nug. That’s why it’s definitely worth it to get a high-quality, metal grinder. Breaking the bigger buds into a soft pillow of herb allows the hot air from the vape to travel through them, pulling all those wonderful, goodness-filled trichomes off the plant matter and through the chamber. If you don’t have a herb grinder and currently use the fingers to break things up, we highly recommend getting a grinder to start efficiently vaping without waste.
Packing a Dry Herb Vape
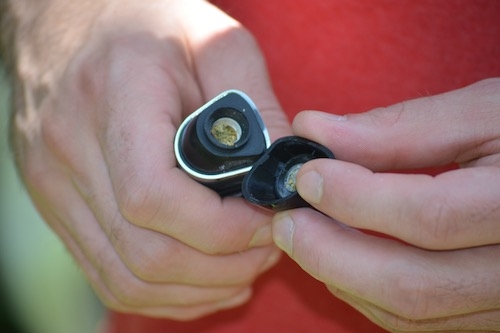
Everyone should learn how to use their own vape pen. And packing the chamber is one part of that.Once you have a soft, pile of ground herbs, it’s time to pack your vape. The bigger the heating chamber, the easier it will be to load. For example, the chamber on a desktop vaporizer is typically larger and more user friendly because they have more space to work with. With care, any chamber can be easily loaded by hand. If you have a smaller chamber, here’s a good trick:
1. Fold a piece of paper down the middle to use as a funnel
2. Place the crease of the paper on the top of the heating chamber and pour your ground herbs onto the crease
3. Slowly pour the herbs down the paper and help them slide into the chamber
Now it’s also very important that the herb is lightly packed. If you pack it too tight, it will constrict air flow which leads to less efficient vaping. On the other hand, if you barely put anything in, you’ll just get air when you go for a big pull. You will want a nice, light pack that fills your chamber right to the edge. That way you get all those wonderful flavors and aromas from your herbs while taking up space.
Choose the Vaping Temperature
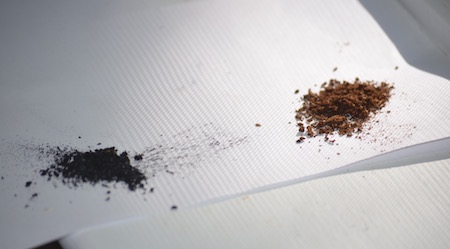
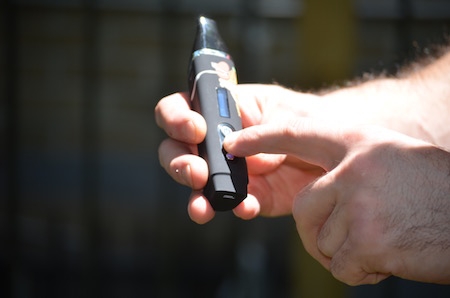
Some vape pens are so simple that you just need to charge, load and turn them on to start vaping. However, the more complex vapes all have a temperature setting. Some have a manual dial and others have an electronic display. Either way, it’s a good idea to get to know vaporizer temperatures. The ideal temp for vaporizing most herbs is around 375-410°F, but each pen will vary in actual temperature. For this reason, it’s best to start at a low setting and work your way up. Once you reach temperatures upwards of 235°C (455°F), your herbs could start to burn, cancelling out any health benefits from vaping and releasing a harsh smoke/vapor. If you ever empty out your used herbs and they’re black and ashy, the vape is way too hot – that or you are using a combustion vape. That’s why it’s best to start low and work your way up until you’re getting a nice fine cloud of vapor that’s bursting with flavor. Your dry herb should have a slightly toasted look when finished and can eventually turn to a brown dust.
When to Change out the Herbs
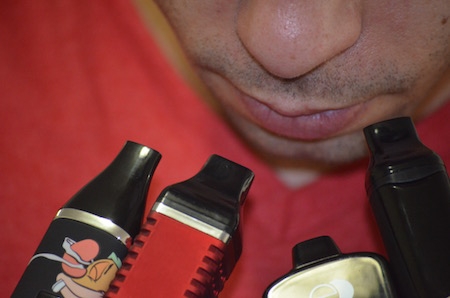
If you’re used to a wax pen, get ready to open the vape pen a lot more. Wax is a concentrate, so each pull only uses a tiny amount of wax. Dry herb vaporizers are a different story. When you start out, you’ll be getting flavor-filled, aromatic hits. However, those tasty trichomes are quickly pulled into your vapor and the flavor will start to fade each drag. If you take a peek into the chamber, you’ll see that the color of your herb also fades into a pale brown. Once all the flavor and color is gone, it’s likely time to change out the herbs.
Maintenance and cleaning a dry herb vape
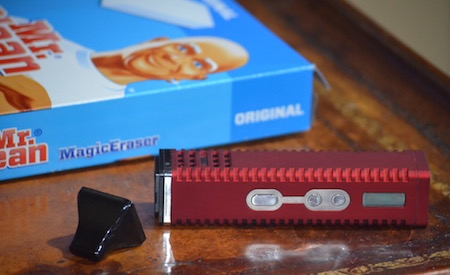
The great thing about dry herb vaporizers is they require very little cleaning if maintained properly. The only pieces that should be cleaned regularly are the filter screen and mouthpiece. Below are detailed steps to cleaning each piece:
1. Filter Screen: All vapes differ, but in many models, the filter screen is located within the vape mouthpiece and it is designed to stop any larger particles from getting sucked up. After a bit of use, this screen can become blocked up and you might notice it’s harder to take pulls. To clean it, just unscrew the mouthpiece, remove the screen and shake it around in some rubbing alcohol (97% works best) for a couple minutes. Once all the particles and built-up resins are gone, rinse it under warm water, dry, and then place back into the mouthpiece. Replacement vape filter screens are available for those that lose or too lazy to clean.
2. Mouthpiece: The mouthpiece can be cleaned the same way as the filter screen or you can just dip a small cloth or cotton swab in alcohol and use it to clean the mouthpiece inside and out. Again, rinse in warm water and dry before re-attaching the mouthpiece. To save yourself unnecessary cleanings, clean both mouthpiece and filter screen at the same time.
Charging your Dry Herb Vape
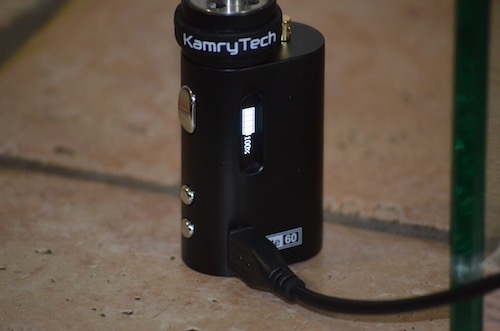
All vapes work differently so it’s important to review the charging instructions of any vaporizer. Typically you can find a manual included or online. At NY Vape Shop, we have user manuals alongside the products. With most vapes, make sure to avoid leaving on the charger too long – it’s not good for batteries in general. The exact lighting or function depends on the vape but often after connecting a vaporizer to the charger and plugging it in to a usb port, a red light will turn on, and when charged it turns green or maybe blue, but again in depends on exact vape model. Never leave your vape charging overnight.
Where to find more information about Vapes for dry herb
1. Read more articles and reviews on dry herb vapes on our Blog
2. You can also find an extensive selection of dry herb vapes in our Vape Shop
Related Blog Posts
E-Cigarette vs. Vaporizer - Everything You Need to Know
Blog Categories
- Home
- Industry News
- Vaporizer Reviews
- Dry Herb Vape Tutorials & FAQ
- Wax Pen Vape Tutorials & FAQ
- Oil Vape Pen Tutorials & FAQ
- Vaping Guides & Information
- Dabbing FAQ & Guides
- Smoking Pipe Tutorials
- NY Vape Shop Listicles
- Vape Pen Comparisons
- Vape Shop How To Articles
- Vape Shop Buyers Guide
- Vape Pen Basics
- Herb Grinder Reviews
- Dry Herb Vaporizer Reviews
- Oil Vape Pen Reviews
- Wax Pen Reviews
- Box Mod Vape Reviews