What is a Gravity Bong
Gravity Bong Introduction
Smoking has undoubtedly inspired some of the greatest innovations in history. One of these great moments was the one responsible for the invention of the gravity bong.
What is this fabulous thing we call the gravity bong, you may ask. Well, quite simply, it is a smoking device, another way of consuming dry herbs or tobacco by using air pressure and water to draw smoke. There are two main types of gravity bongs; the bukket bong which is a ready-made, portable bong that can be used on the go, and the second type is the homemade bong type, which can vary depending on exact method and parts available.


The Bukket Bong
One of the best on the market is the bukket pipe, a Waterless Gravity Bong that uses air pressure to function. If it is a huge hit you are looking for, you are not going to be disappointed by this pipe. It delivers massive hits, with a rich smooth texture, but it can be rough, so be careful.
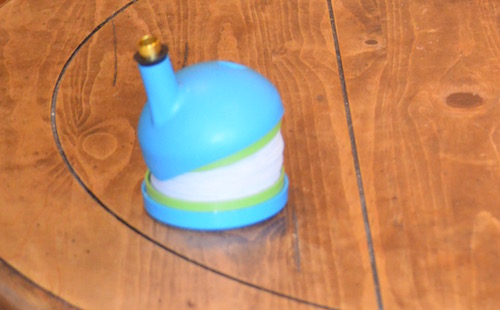
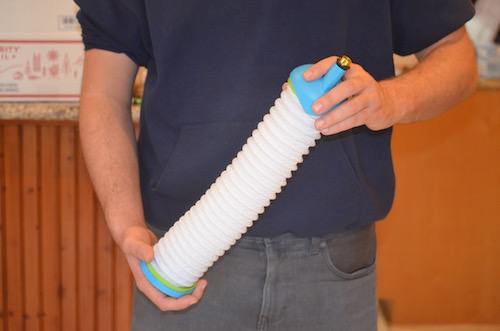
This type of bucket bong looks like an accordion if you open and close it. As you pull up, air is sucked inside through the bowl piece. Now normally that bowl piece is packed with herbs and with a flame is placed right over it, the air being sucked inside will light the herb as if you are taking a hit, and the inside of the bukket bong will fill will smoke.
When you are ready to take a hit, remove the bowl piece to reveal the mouthpiece. Now get ready to take a huge hit because as you collapse the accordion bucket bong together, it will force out the smoke through the mouthpiece, so collapse it at your own pace.
One of the main advantages of this pipe is that its waterless, which means you don't need to have to worry about having a water source nearby, and it is made out of durable parts which make it easily portable. The price is a very really reasonable $29.99, and its super easy house, plus it even comes with a metal bowl piece slide for herb.
Homemade Gravity Bongs
There are 2 main categories when it comes to the gravity bong homemade version. The bucket bong or bottle style, and the waterfall.
Homemade Bottle Bong
The bottle bong is typically constructed using two bottles of varying sizes. If only one bottle or one size is available, you can use a sink or a bucket in place of the missing bottle. The one bottle or bucket is just needed to hold the water, and it needs to have a diameter larger than the second bottle. The second bottle is the one that acts like the bong.
Just like a bong, a bowl needs to be constructed and then placed on the mouthpiece. With the bowl packed with herb, submerge ¾ of the bottle under the water. Just like the Bukket pipe, go to light the bowl and as you do, slowly pull the bottle up. The bottle will essentially be taking a hit and fill with smoke. When ready to take a hit with the amount of smoke desired, remove the bong bowl and push the bottle down – the water entering the bottle will push the amount of smoke out as fast as you allow.
Waterfall Bong
This homemade variety only uses one bottle or container, always, although you may want a sink for the flowing water. Just like the bottle bong, the mouthpiece of the bottle is where you want to assemble the bong bowl for herb. But instead of cutting off the bottom of the bottle, just poke a small hole – you can always go bigger but not smaller.
Simply fill the bottle up with water and cover the hole on the bottom until you are ready – duct tape works well. With a packed bong bowl fixed to the top of the bottle, you can let the water start to flow out of the bottle and into the sink. And at this point you will want to place a flame near the bowl too.
As the water flows from the bottle, air will be sucked inside the bottle. That draws in the flame which heats the herb and brings the smoke inside the bottle. It looks really cool and this might be one of the cooler homemade bongs to watch in action. When ready, remove the bowl piece and take a puff!
How to Make a Water Bong
If this type of bong may sound like something you can make at home, that's because it is. There are quite a few ways of DIY, but here is one of the simplest.
You will need:
- A plastic bottle – we can refer to this as the Main Bottle, and 1-2 liter works best
- A sink, 2nd bottle or bucket to fill (just needs a diameter wider than the main bottle
- Knife or scissor – be careful!
- Aluminum foil
- Something to poke holes with, thumbtack works great
- Dry Herbs
Step 1:
Use your knife or scissor to cut the bottom off of the main bottle. Keep in mind the less you cut off, the more bottle you still have, and therefore the bigger hit you'll get, so trim conservatively.
Step 2:
Fill a sink or bucket with water. If you are using a second bottle instead, cut off the top and then fill with water.
Step 3:
Screw off the cap on the main bottle and now use the cap to make a somewhat sophisticated bong bowl, or just be simple. Simple is making a bowl piece just out of tinfoil and placing it in the mouthpiece of the main bottle. That will be good enough but you can also use the cap plus tinfoil to create a next level bowl piece – the cap just allows you to screw the cap on and off which gives a tighter seal for when the bong is in action.
Step 4:
With whatever bong bowl piece you decide to construct, once constructed, poke some holes in it. A paperclip, thumbtack and similar objects are great for this. Don’t go too crazy but just make sure airflow can happen.
Step 5:
With a fully loaded bowl pack in place, place the bottle into the bucket of water – obviously keep the bottle neck and bowl piece above the water. Hold onto the bottle so that it does not float or knock over any herbs.
Step 6:
Now light the herb while pulling the main bottle up and out of the water, letting it fill with smoke. As the bottle is pulled upward out of the water, air is forced into the bottle bringing with it smoke.
Step 7:
Remove the bowl piece and place your mouth over the top of the bottle. Push the bottle back in to the water, forcing the smoke up and out as you take a hit. Be prepared to have your mind blown.
Gravity or No Gravity?
So, now you may be wondering, why the gravity bong, or why not for that matter?
When it comes to choosing between a gravity and a traditional bong, there are several things to take into account. Firstly, this bong generates a lot more smoke than most other types of bongs, which means you're going to get a lot of smoke into your lungs and get flattened quite quickly. That also means, you're going to economize on your stash, because with these bongs a little goes a long way. Plus, you have the option to build your own, which can save you some of the other kind of green.
However, the choice may also have a lot to do with the individual products. For example, a grav bong has nothing on a nice Roor or Jerome Baker. A glass water bong has a much smoother hit, especially when accounting for the ice catcher that is now so common these smoking pipes. But then again you don’t want to bring the prized bong into the woods either. So, at the end of the day, all the different bongs out there on the market, including the Grav bong, have their place for the right time and occasion, it all depends on what time it is.
Conclusion
So, we end where we began, with the mixture of awe and respect for the endless capacity of this type of bong. They can be store bought or homemade in a variety of fashions. Affordable, sometimes portable and easy to use – at least once you get the hang of it. Any more questions about this? Just reach out and we will help!